RideApp Vendor Panel Documentation
Welcome to the documentation for the Ride App Vendor Panel! This guide will provide you with a comprehensive overview of the vendor panel's features and functionalities, allowing you to effectively manage your all delivery services. The Vendor Panel is a web-based interface that provides vendors with tools to manage their information, menus, orders, and more. Let's get started!.
Table of Contents
1. Accessing the Vendor Panel
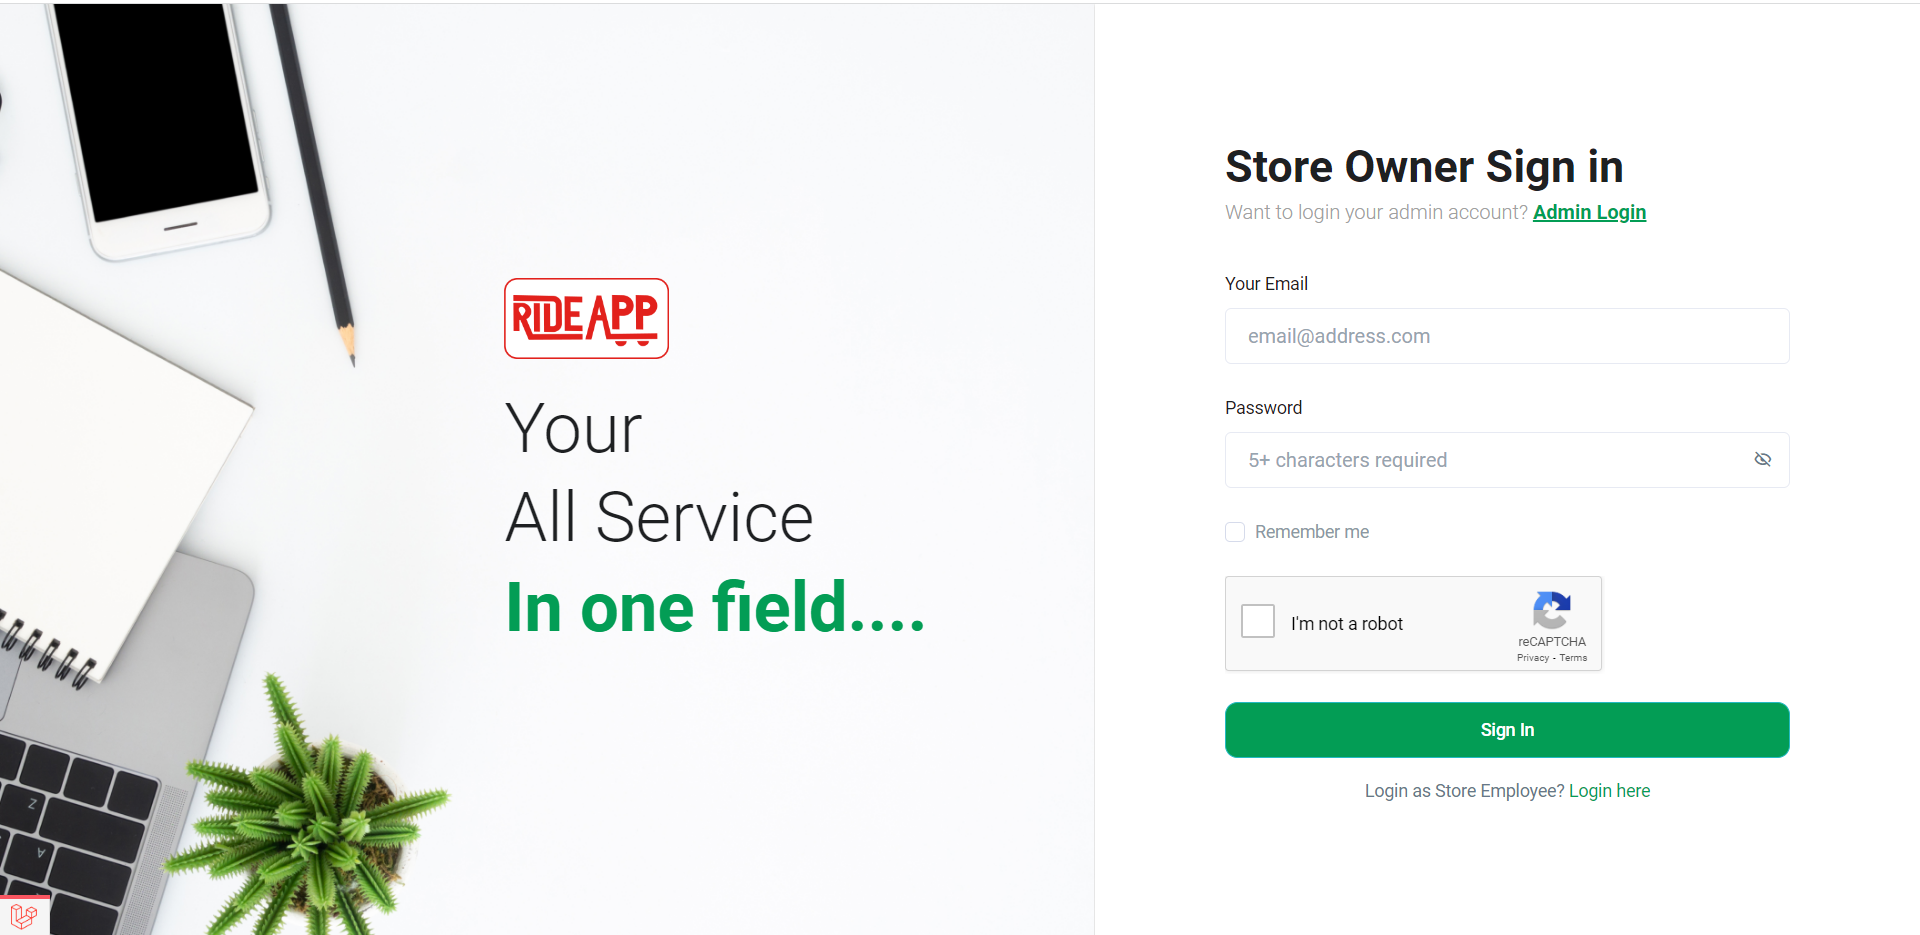
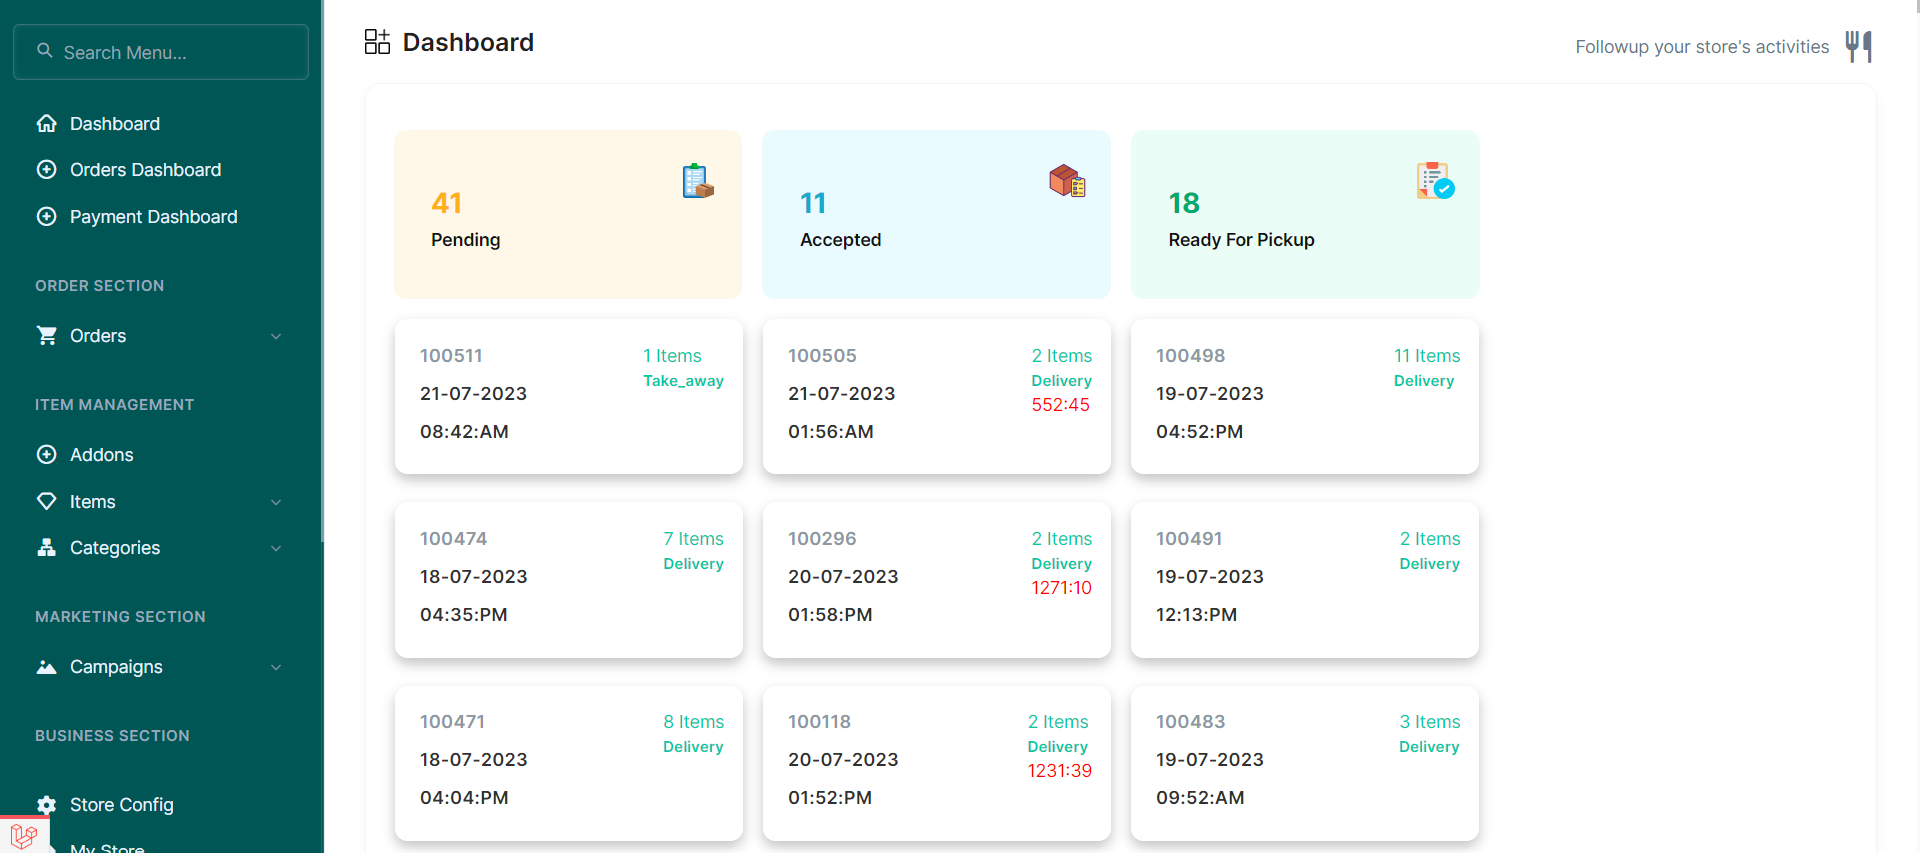
To access the Vendor Panel, open your preferred web browser and navigate to the Ride App Vendor Panel login page using the following link https://rideappglobal.com/vendor-panel/auth/login. Enter your credentials (username and password) and click "Log In" to access your account. upon logging in, you will be greeted by the Vendor Panel dashboard. The dashboard provides an overview of your all current order status, Top selling items, and most rated items.
2. Orders Dashboard
In the Orders dashboard, you will see a list of orders with various statuses. Here are the order statuses and their meanings:
- Pending: The order has been placed by the customer and is awaiting confirmation.
- Accepted: You have accepted the order, and the restaurant is preparing the food.
- Ready for Pickup: The order is ready for picup by rider.
3. Viewing Orders
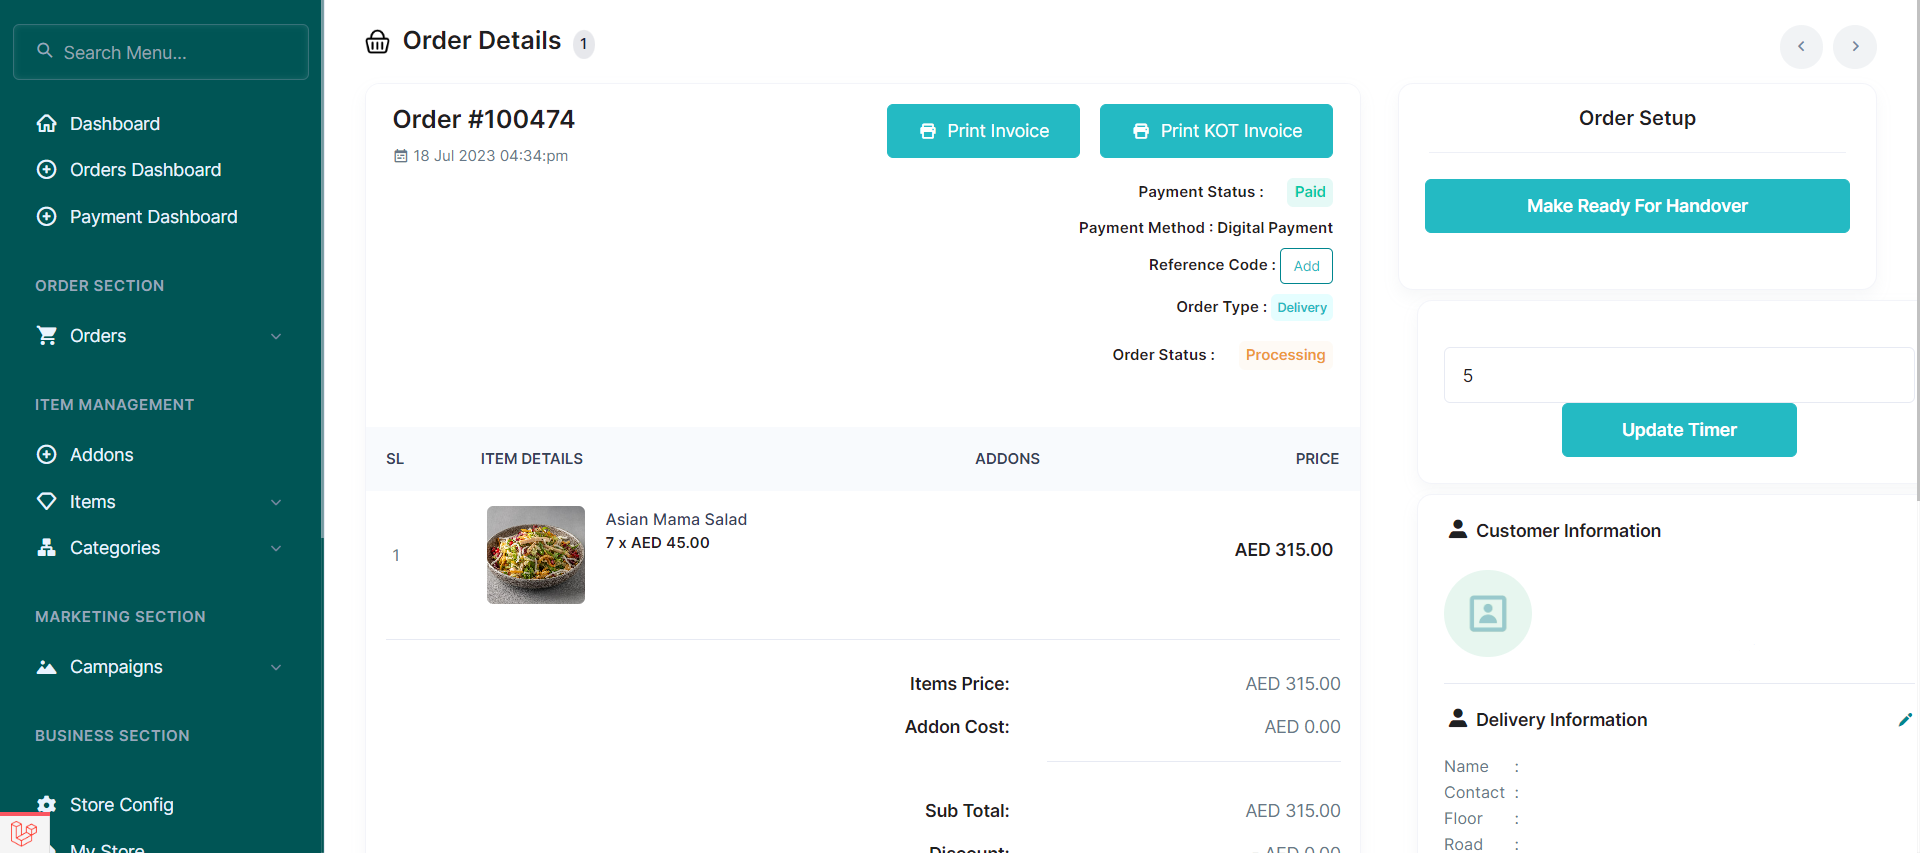
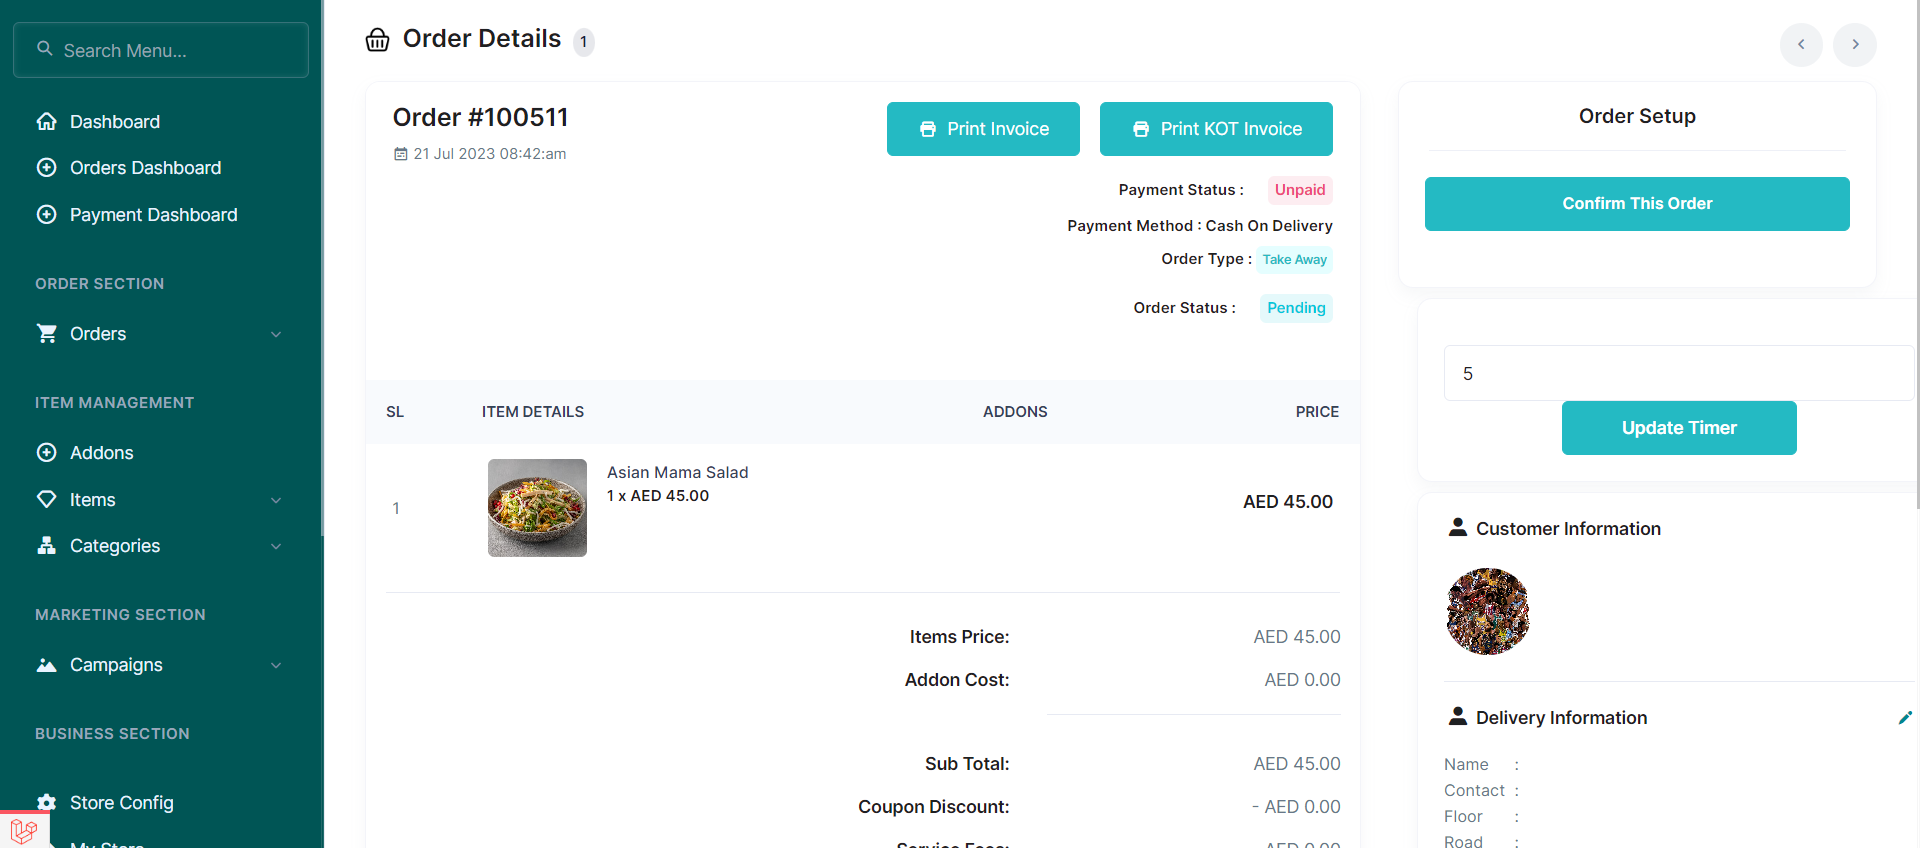
To view more details of a specific order:
- Click on the order in the list that you want to review.
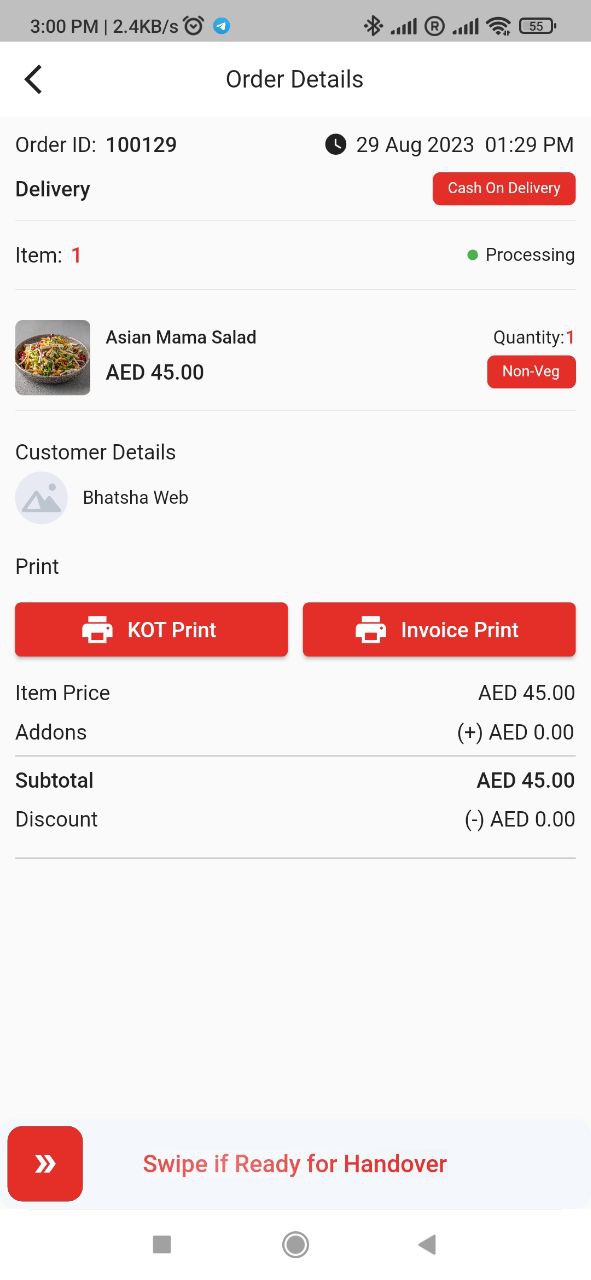
- The order details page will open, showing information such as order items, delivery instructions and delivery type.
- you can print invoice and KOT using print button.
4. Updating Order Status
When you receive a new order, you must accept it. Here's how:
- Upon receiving a new order, you will see it in the "Pending" status in the list.
- Review the order details to ensure accuracy and availability of items.
- If you can fulfill the order, click on the "Confirm this order" button to confirm the order.
- Provide preparation minutes for this order. these minutes will run on the accepted orders.
- If the order is prepared, click on the "Make Ready for Handover" Button to assign rider for this order.
- Finally, the rider will pick up the order and deliver it to the customer.
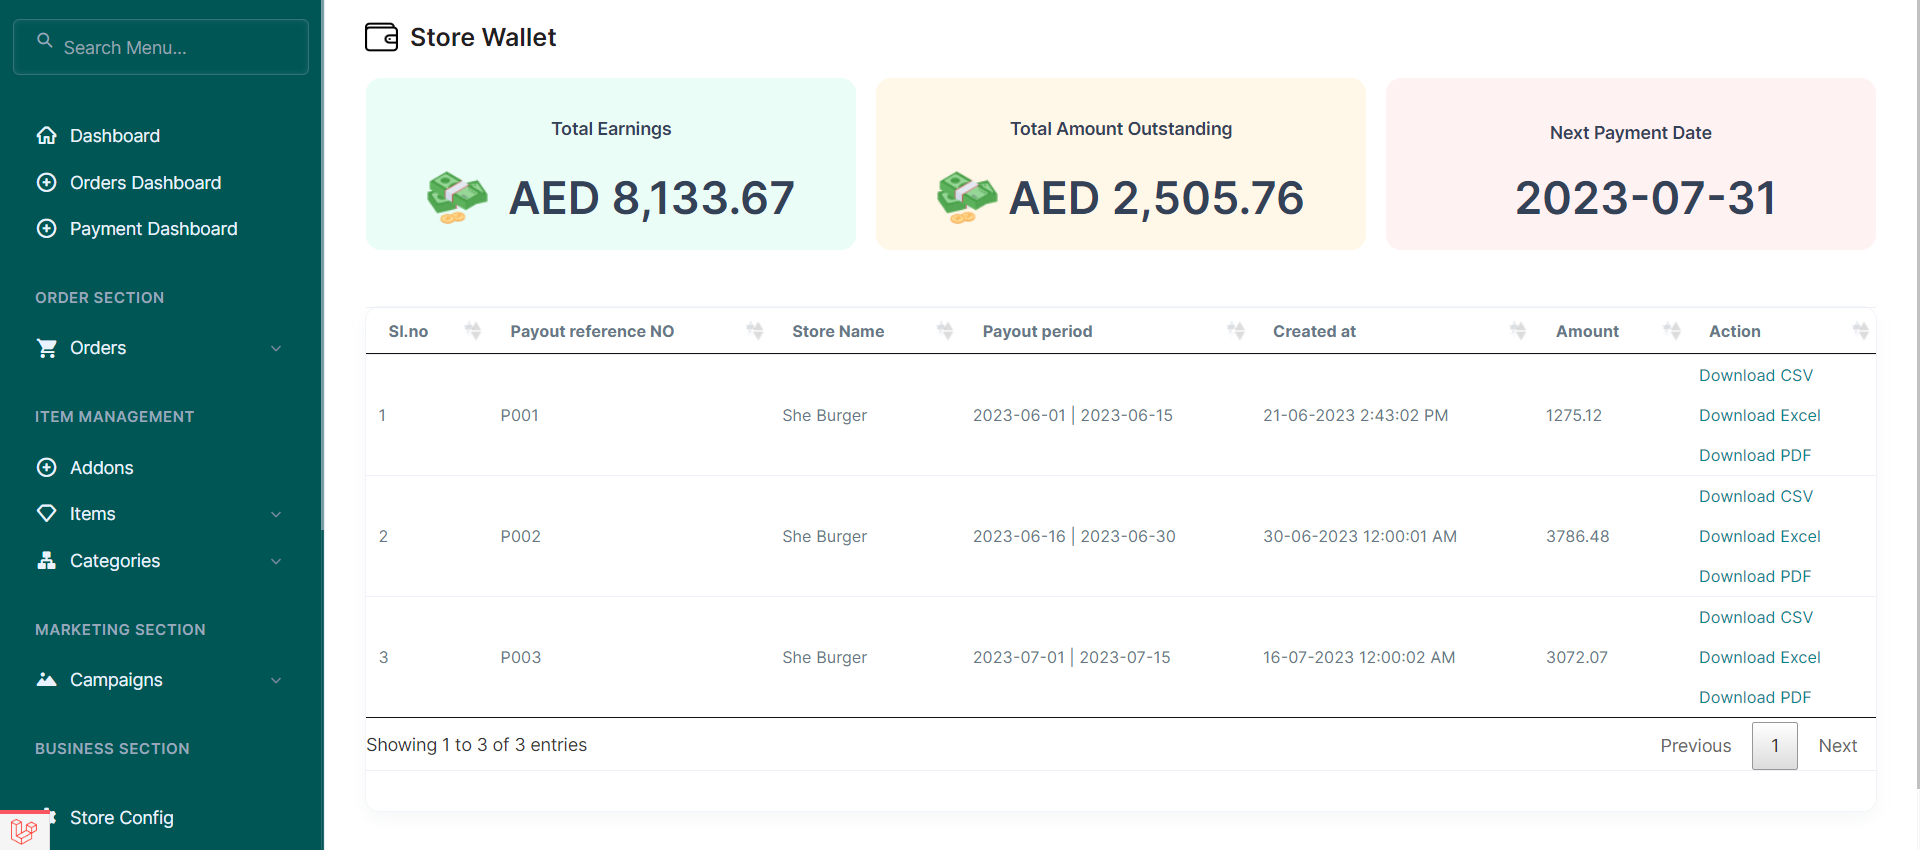
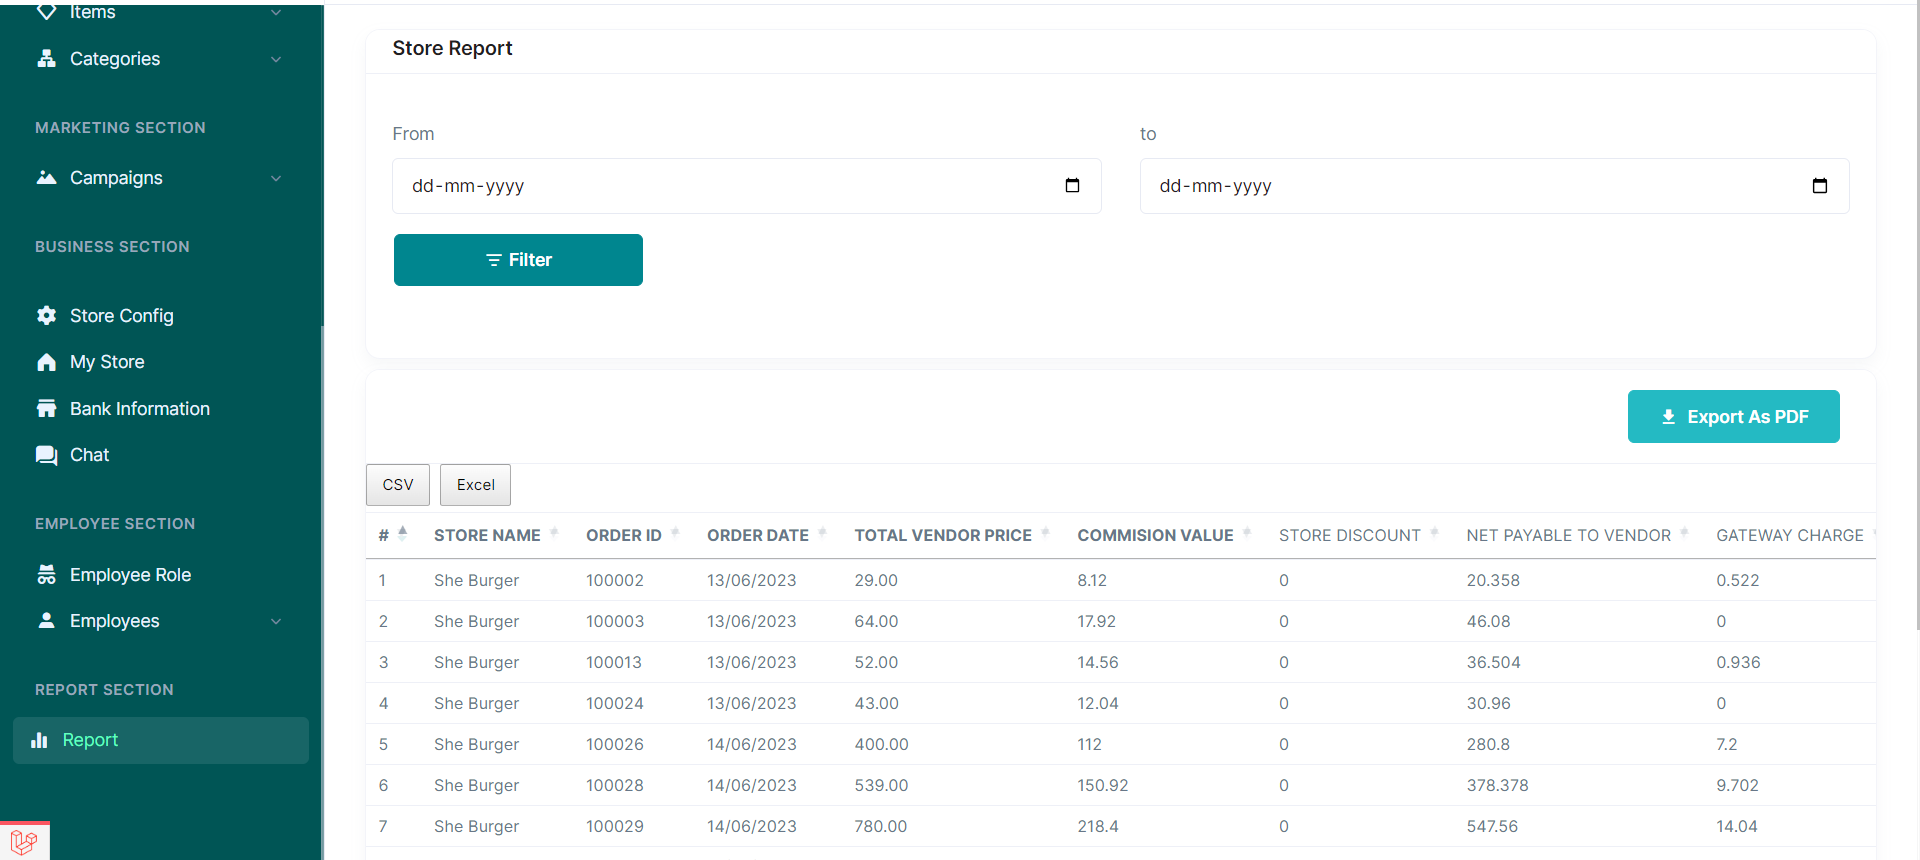
5. Payment Dashboard
In this section you can see pending settlement amount and settled amount details. you can download report in various format such as csv, excel, pdf for past settlements.
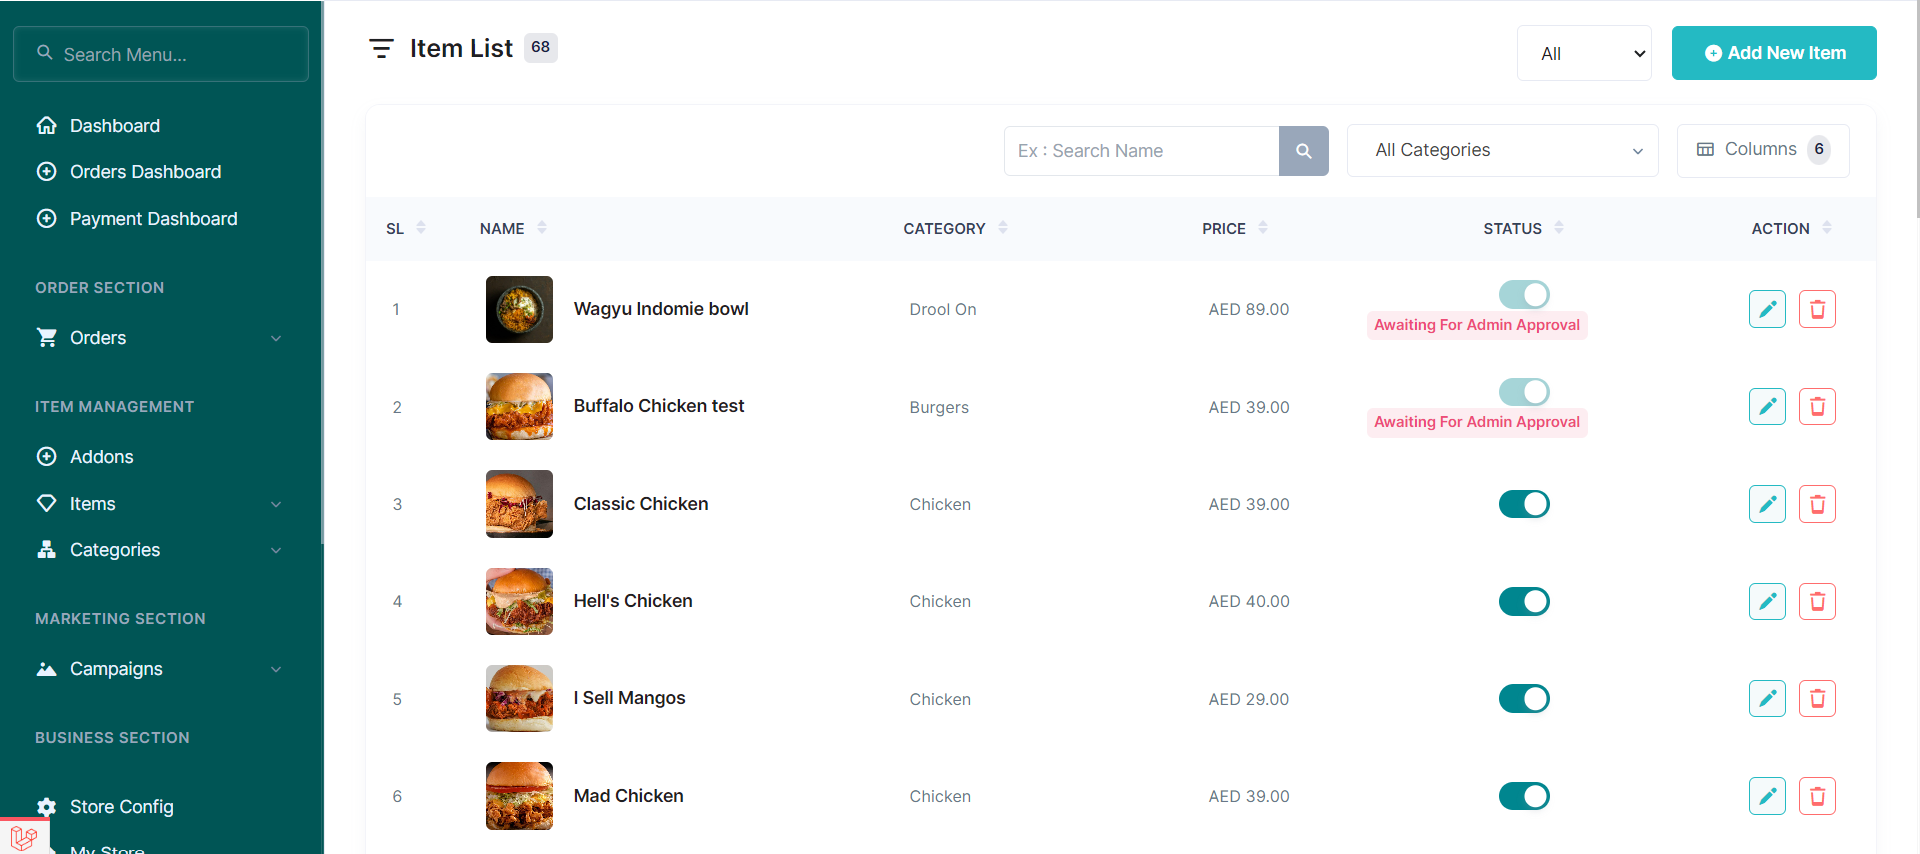
6. Item Management
Efficiently managing your menus is crucial to providing customers with accurate and appealing food options. The Item Management section offers tools to handle menu-related tasks. Here's how to update your menus:
- Navigate to the "Items" tab in the sidebar menu.
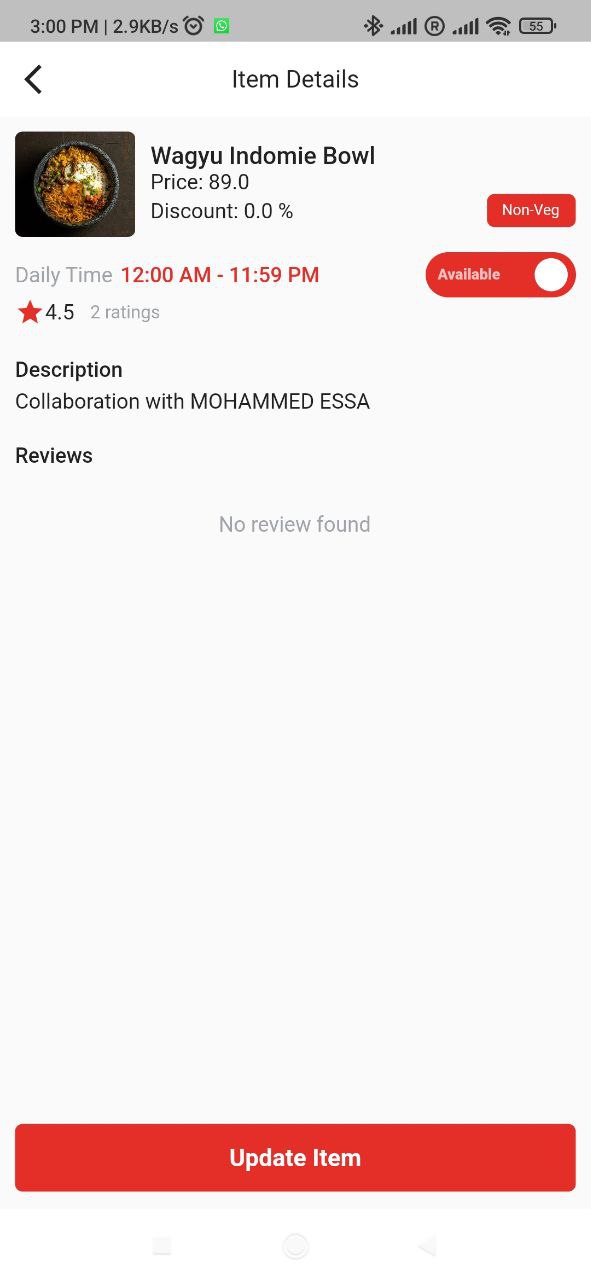
- Add new items to your menu by clicking on the "Add New" button and providing details such as name, description, Category, Subcategory, price, and photos.
- Update existing items by selecting them from the menu list and clicking on the "List" button. Make the desired changes and save them.
- You can deactivate or activate items by selecting them and choosing the status option.
Note
new menu and update menu are must approved by admin for change effect in customer app.
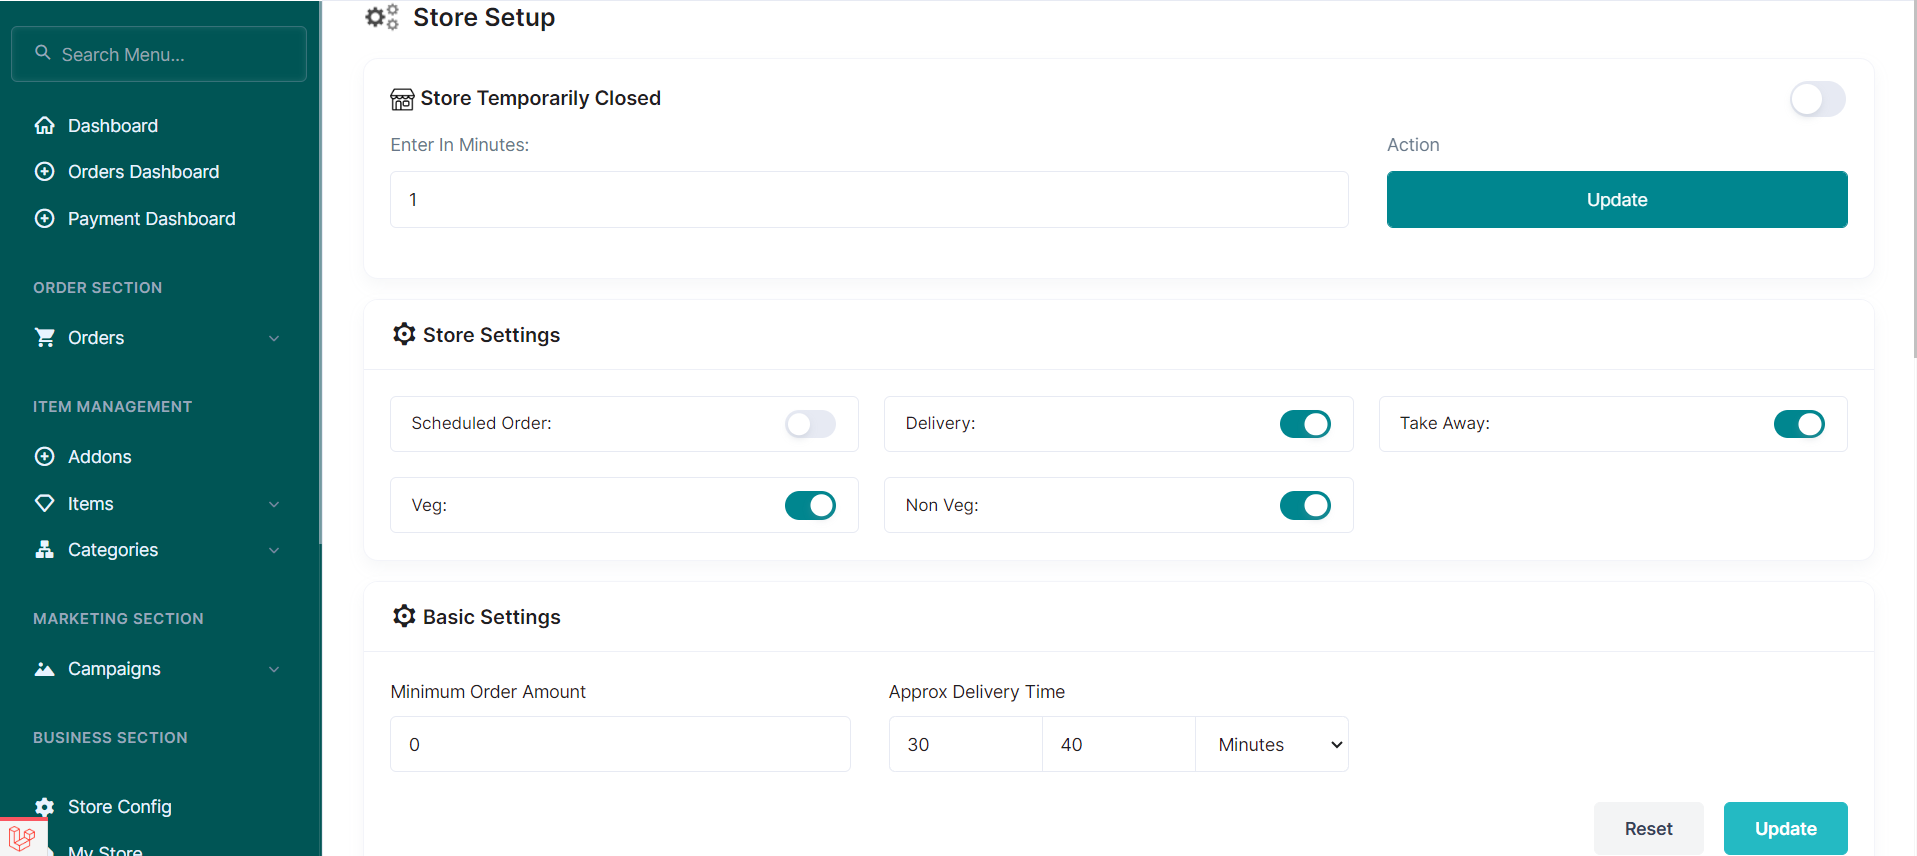
7. Manage store settings
The Business settings allows you to configure various settings to customize your Store.
- Open/Close Store - give closing minutes in text box and click update. then enable checkbox for temporarly close the store. if you give empty minutes, the store will be closed upto you open manually.
- Daily Time Schedule - you can set daily time schedule in this section. the store will automatically open and close as per given time schedule.
- My store - In this section you can see your store information such as name, address, contact details and commission details.
- Bank information - In this section you can see your bank information for settlement
- Reviews : In this section you can see customer given reviews and ratings for your products
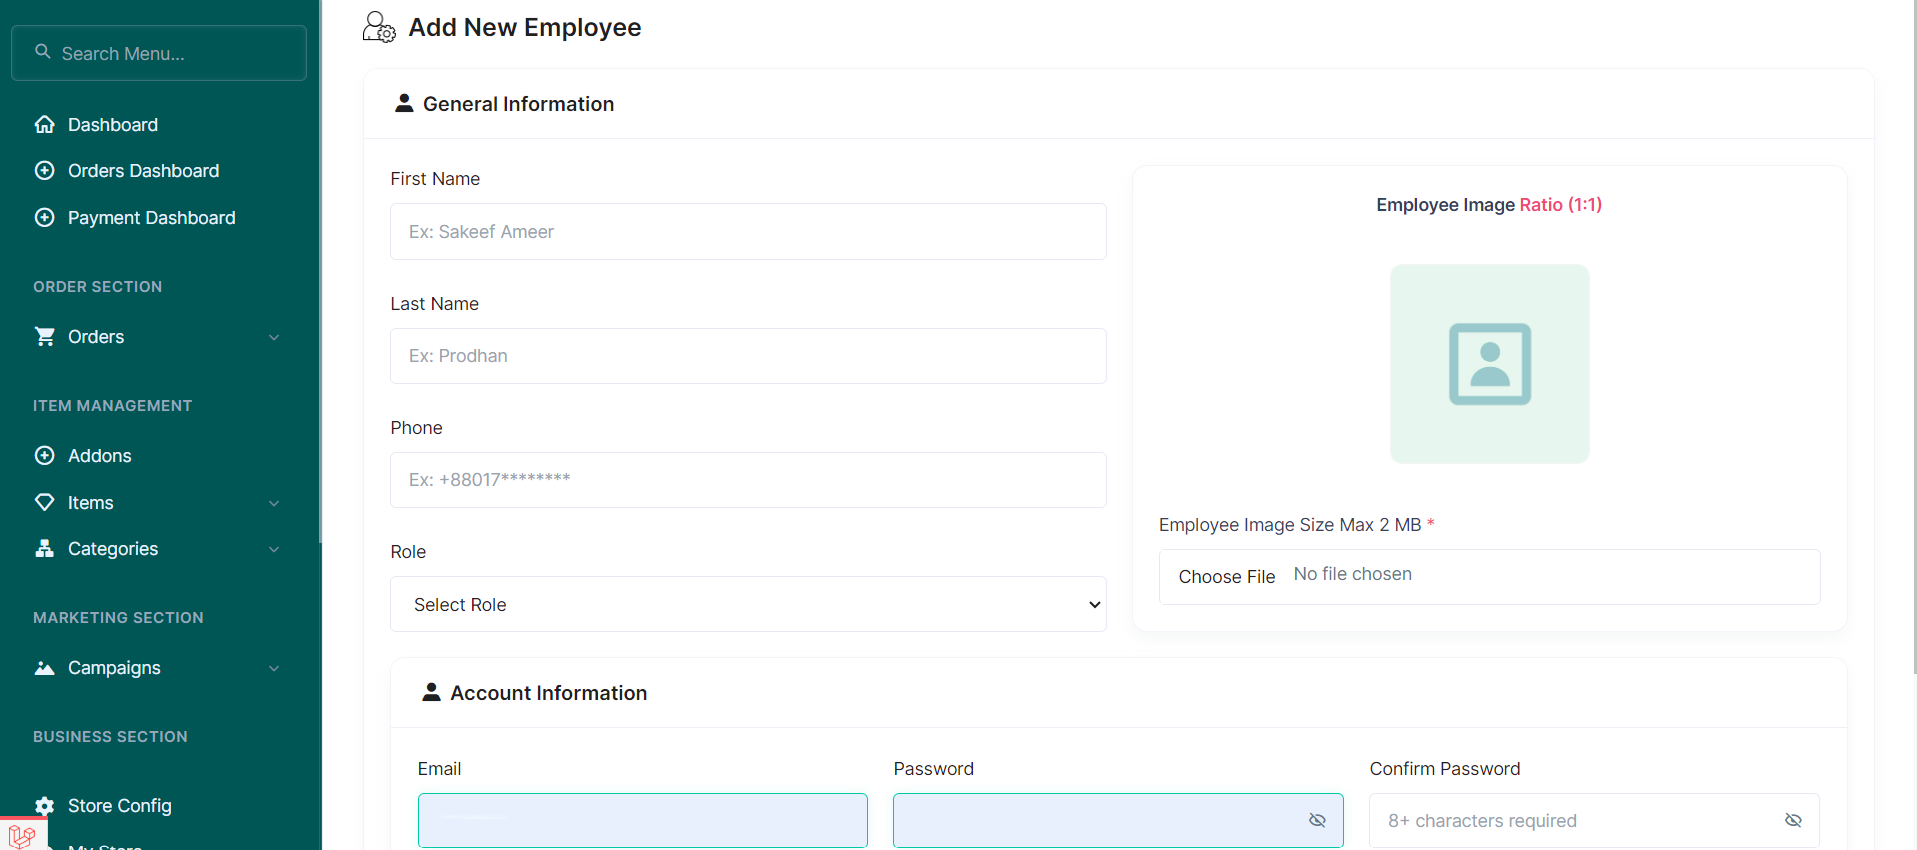
8. Employee Section
In this section you can create new employees and employee roles for manage your store
employee role : you can create new role like accountant, counter staff and give specific access from vendor panel
9. Report Section
In the report section you can see completed order history and details.
RideApp Vendor App Documentation
The RideApp Vendor app is a mobile app that allows store owners to manage their orders and items.
The app allows store owners to do things like :
2. Receiving and Managing Orders
3. Adding and Updating Menu Items
1. Accessing the Vendor App
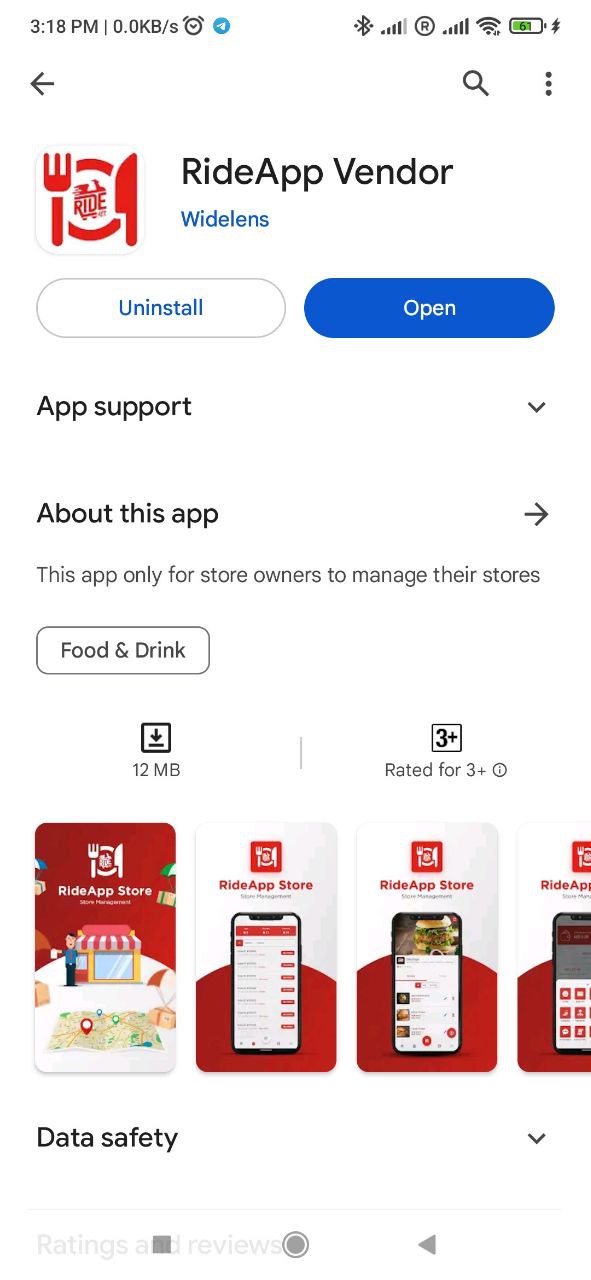
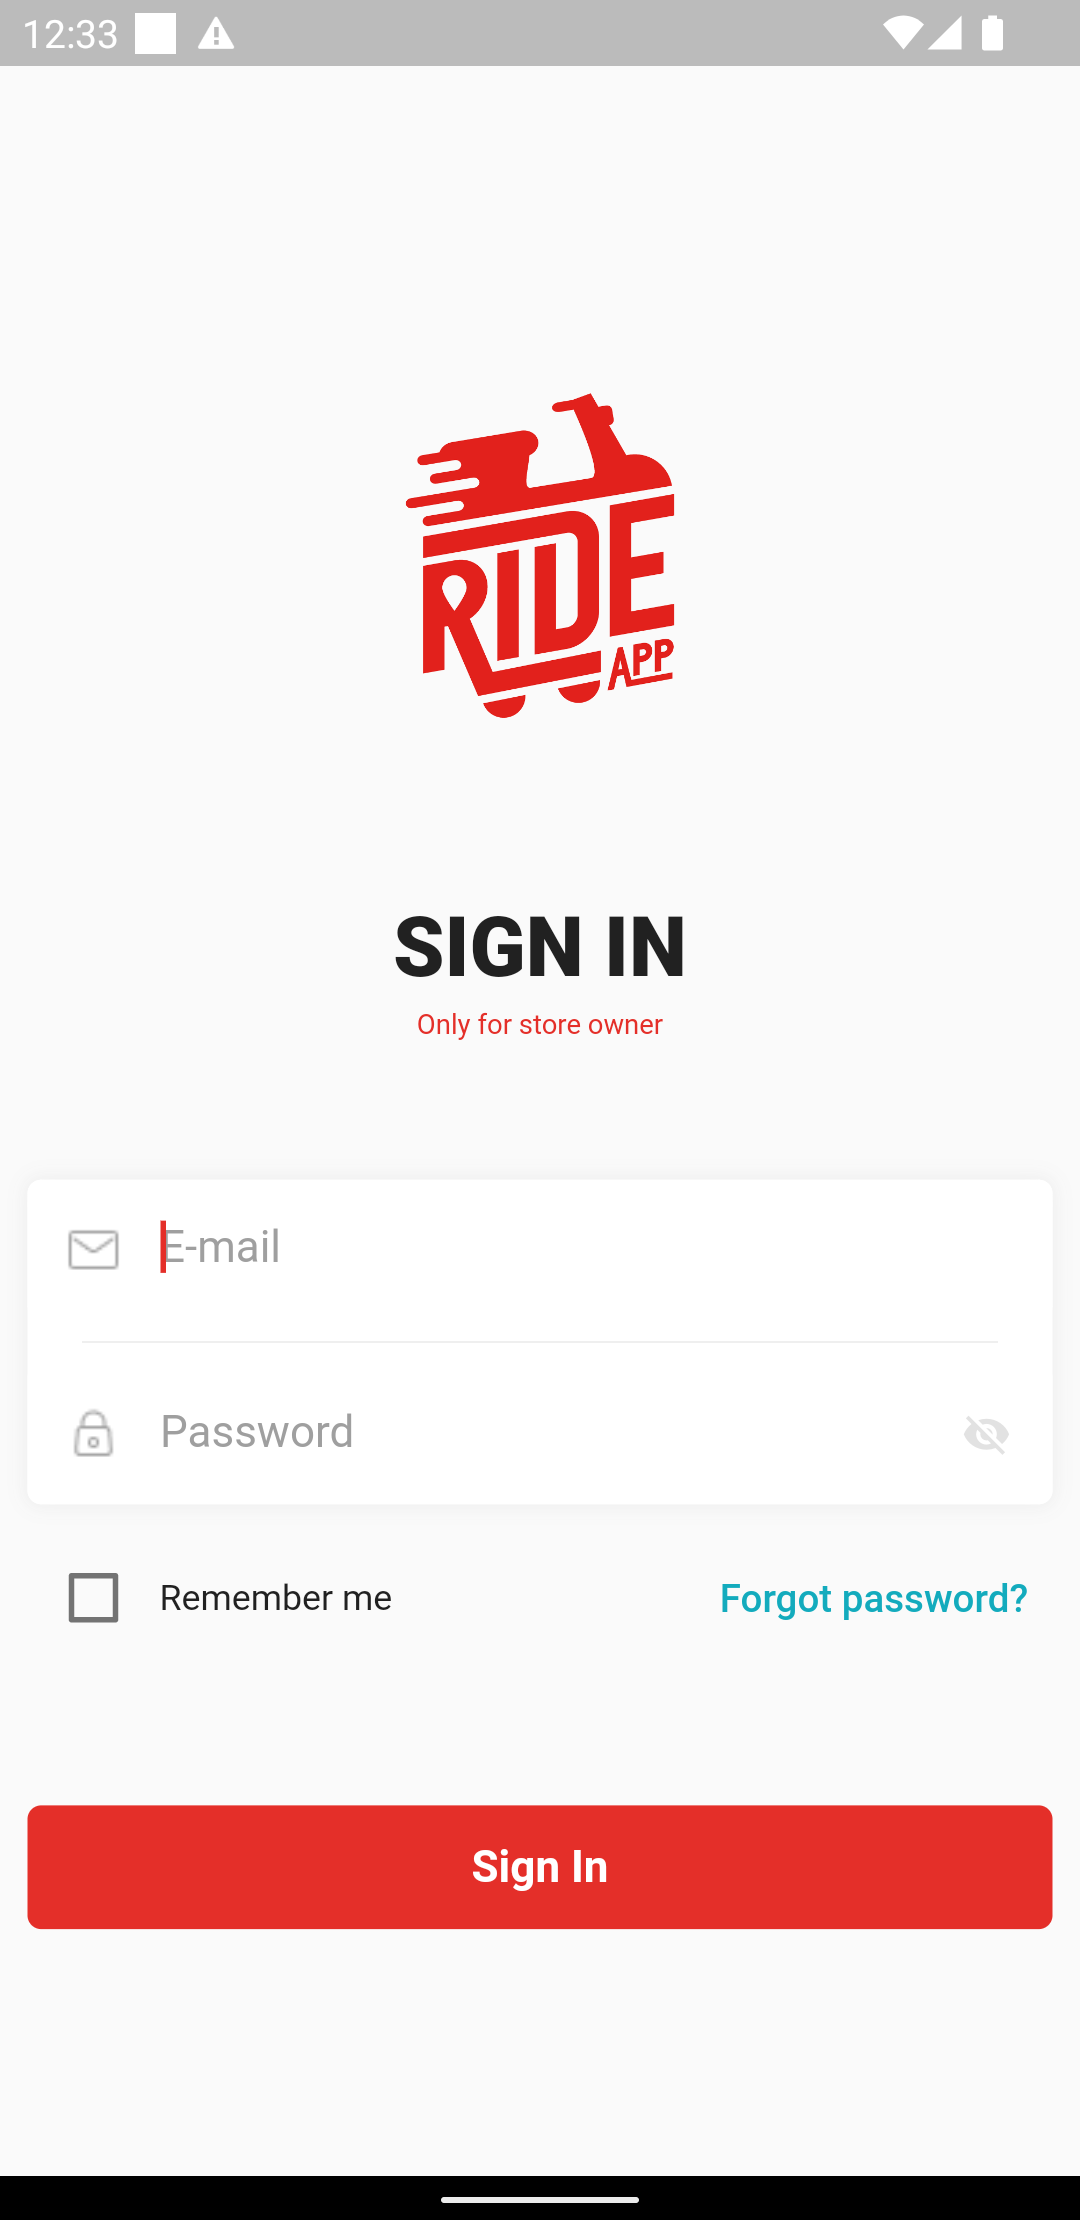
To access the Vendor App, download the RideApp vendor App from playstore using the following link https://play.google.com/store/apps/details?id=com.rideapp.store. Then open the installed App and enter your credentials (username and password) and click "Log In" to access your account.
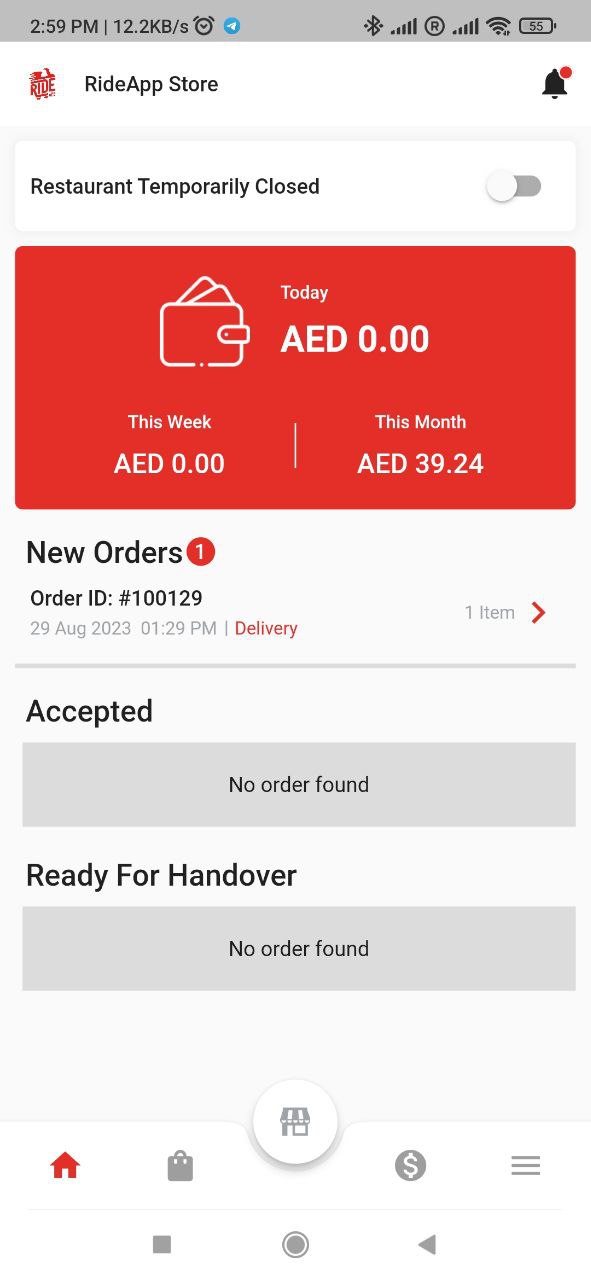
2. Receiving and Managing Orders
Receiving Order Notifications- When a customer places an order, you'll receive a notification with order details and delivery information.
- You can also periodically check the "Orders" section for new orders.
- Review the order details, including items, quantities, and delivery address.
- Swipe the confirm order button to accept the order.
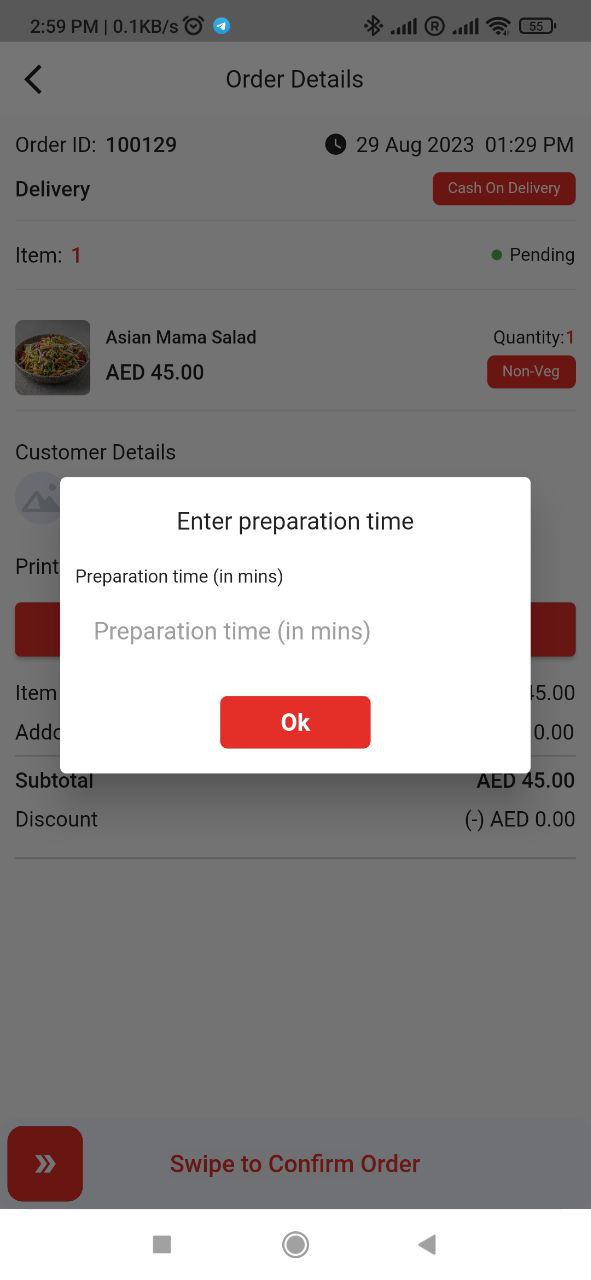
- Then you will get a popup for preparation time. enter the preparation time in the text box.
- Now its your time to prepare the order.

- After preparing the item now swipe the order ready button to change the ready for handover status.
- Swipe the confirm order button to accept the order.
- Finally, the rider will pick up the order and deliver it to the customer.
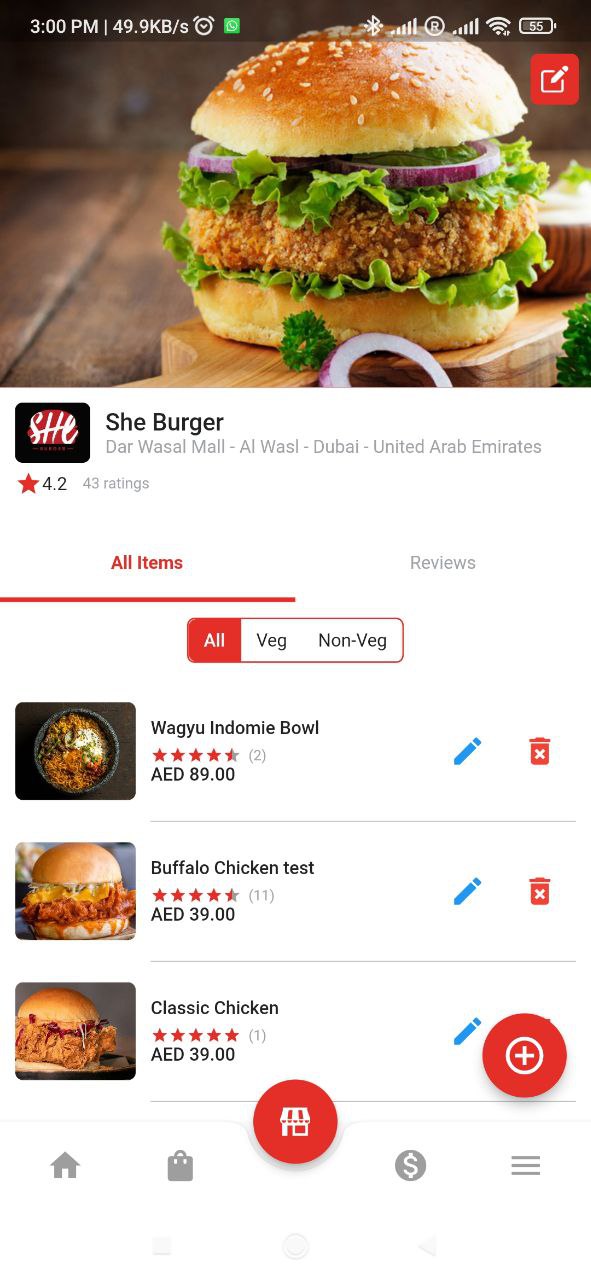
3. Adding and Updating Menu Items
- Goto the menu section by clicking the bottom center store icon
- Add new menu items by providing a name, description, price, and optional photo.
- Edit or remove existing menu items as needed.
- Save your menu changes.
If you encounter any issues or need further assistance with the Vendor Panel, please reach out to our customer support team through the following channels:
- Email: [email protected]
That concludes the documentation for the RideApp Vendor Panel. We hope this guide helps you effectively manage your food delivery services. Happy delivering!